On this page
- Guest link or intake form?
- Who may manage intake forms
- Creating an intake form
- Publishing
- Embedding it on your own website
- What the customer fills in
- The confirmation (double opt-in)
- The case in the inbox
- Let customers take part in a running case (portal)
- Maintain the organization-wide role catalog
- Create an external role
- See all external contacts organization-wide and revoke access
- Set up look and protection
- Security and privacy
Guest link or intake form?
Both bring in external people without a login, but with one key difference: a guest link points to an existing task in a case that is already running. An intake form has no case yet — it creates a new one on submit. So use intake forms wherever a request from outside should kick off a process: contact request, application, appointment request, complaint.
In short: guest link = help out mid-process. Intake form = start the process from outside.
Who may manage intake forms
Making a form public is a deliberate release. So intake forms can only be created, published or deactivated by people who hold the “Manage public intake forms” permission — by default everyone who may also create templates or cases. The permission is organization-wide.
Creating an intake form
Open the template whose process the form should start. In the template's ⋯ menu you'll find “Public intake forms”. There you create a new form and fill in four things:
- Title
- the heading the customer sees above the form (e.g. “Contact request”).
- URL slug
- the unique part of the public address /f/<org>/<slug>. It is auto-derived from the title, remains editable, and stays stable once published so shared links keep working.
- Intake task
- the task of your template whose output fields become the public form. Exactly those fields are what the customer sees.
- Consent text
- the text the customer confirms via a required checkbox (GDPR). It is pre-filled with a sensible default and can be adjusted.
Plus two toggles: “Require email confirmation (double opt-in)” and “Bot protection (Turnstile)”. Both are on by default — the right setting for everyday use.
Publishing
After saving, the form appears as a draft in the list. Only “Publish” makes it live: Bricksta freezes the current fields of the intake task as a snapshot and activates the public link. Important: if you later change the template's fields, they only take effect once you publish the form again — so a template change never breaks a submission in progress.
- 1Open the template → ⋯ menu → “Public intake forms”.
- 2Enter a title (the URL slug fills in automatically), pick the intake task, review the consent text.
- 3Click “Save” — the form appears as a draft.
- 4Click “Publish” — the fields are frozen and the link goes live.
- 5Copy the link and share it (website, email signature, QR code).
Embedding it on your own website
A common wish: the customer wants to offer the form right on their own website, so a visitor starts a case there. Nothing technical is needed for that — the published link is enough. Always grab it via “Copy link” from the form list and never type it out by hand.
The copied link contains a technical organization identifier (a long ID) and the correct web address. So always copy it rather than assembling it yourself — a hand-typed link easily points nowhere.
- Option 1 — button or link (recommended)
- Just put a link or button on the website that opens the copied link (ideally in a new tab). This is the most robust way — no height or layout issues. Ideal for a button like “Start a request”.
- Option 2 — embed directly (iframe)
- If the form should sit in the middle of the page without the visitor leaving it, embed it via an iframe. Almost every website builder has an “embed HTML/code” element for this (e.g. WordPress “Custom HTML”, Webflow or Wix “Embed”). There you enter the copied link as the iframe's source (src).
An embed snippet looks like this — put the copied link into src: <iframe src='YOUR-COPIED-LINK' style='width:100%; min-height:1000px; border:0'></iframe>
Two things to watch with an iframe: give it a generous minimum height (e.g. 900–1200 pixels), because an iframe does not grow with its content on its own and would otherwise cut off fields; and set the width to 100% so it adapts to the page and to mobile. The form itself is already mobile-friendly.
So the embedded form looks like you and not neutral, set a logo and accent color under “Organization → Branding” — both also apply inside the iframe on the external website.
What the customer fills in
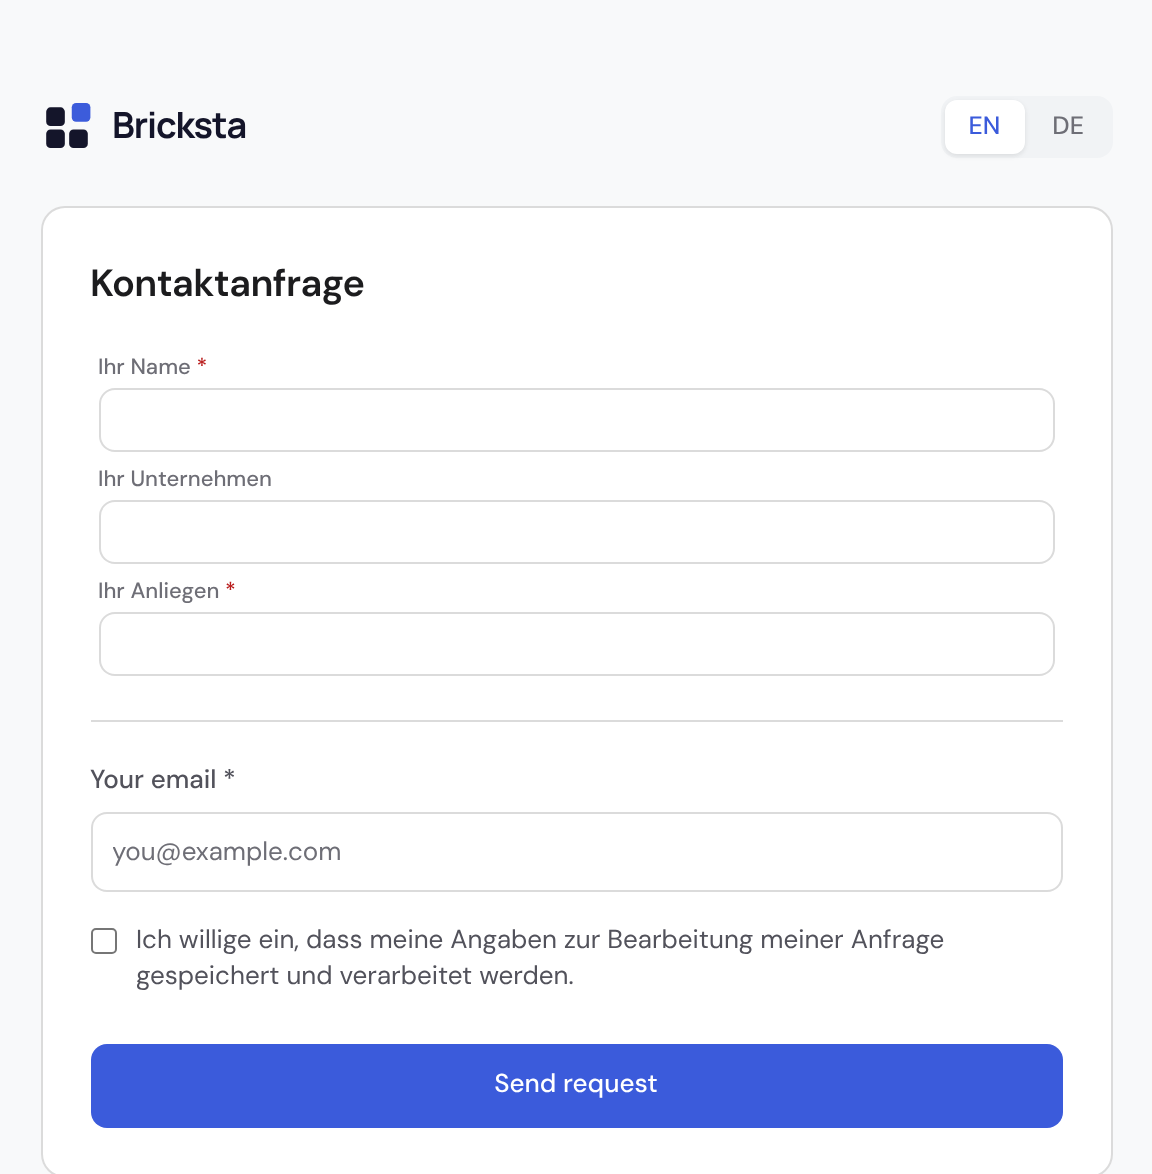
The customer opens the link and sees a plain, mobile-friendly page with the form — the same fields as internally (required fields, dependent fields, option lists, validation), plus a built-in required field for their email address and the consent checkbox. They can switch between German and English at any time. After submitting, depending on the setting, no case is created yet — first comes the email confirmation.
The confirmation (double opt-in)
If email confirmation is on, the customer receives an email with a confirmation link after submitting. Only when they click it does Bricksta create the case. This has two benefits in one: it prevents spam cases from mistyped foreign addresses and at the same time records the customer's consent. Without confirmation, no case is created.
For contexts where confirmation is unnecessary, you can turn it off per form — then the case is created immediately on submit.
The case in the inbox
As soon as the case is created, it appears in your case list — marked with an “Intake” badge. The customer's entries are in the intake task; an internal team member reviews them and works the case as usual. As with the guest link: the customer completes nothing — control stays with your team.
Let customers take part in a running case (portal)
An intake form starts the case — but sometimes you need the customer again later: a missing document, an approval, a follow-up question. That is what the customer portal is for. On the template you define external roles (e.g. “Customer” or “Guarantor”) and mark individual tasks as external. As soon as such a task comes up in the flow, the rest happens on its own.
Maintain the organization-wide role catalog
So that “Customer” or “Project lead (customer)” does not have to be retyped in every template, Bricksta keeps external roles in one org-wide place: Organization → External contacts → “Roles” tab. Whatever you maintain there is offered to every template. The tab only appears if you may manage external intake forms. Important: external roles carry NO permissions — they are vocabulary, not access. External contacts have neither an account nor rights, which is why the catalog deliberately does not live under “Roles & permissions”.
- 1Open Organization → “External contacts” → “Roles” tab.
- 2Enter a label, e.g. “Project lead (customer)”, and click “Add role”. Bricksta derives the technical key from it — you don't have to think about it.
- 3If the role already exists, Bricksta says so and reuses the existing entry; nothing is overwritten. “Bürge” and “BÜRGE” count as the same role.
- 4Each row shows how many templates use the role. The ⋮ menu lets you rename or delete it.
Renaming takes effect organization-wide: the new label appears immediately in every template using that role. Cases that are already RUNNING keep the label they started with — nothing changes retroactively there. You cannot rename a role to a label another role already uses: a task's picker shows only the label, so two roles with the same name would be indistinguishable there.
Deleting is harmless: templates keep their role and stay functional, only the link to the catalog is removed. A role detached this way no longer follows later renames.
Create an external role
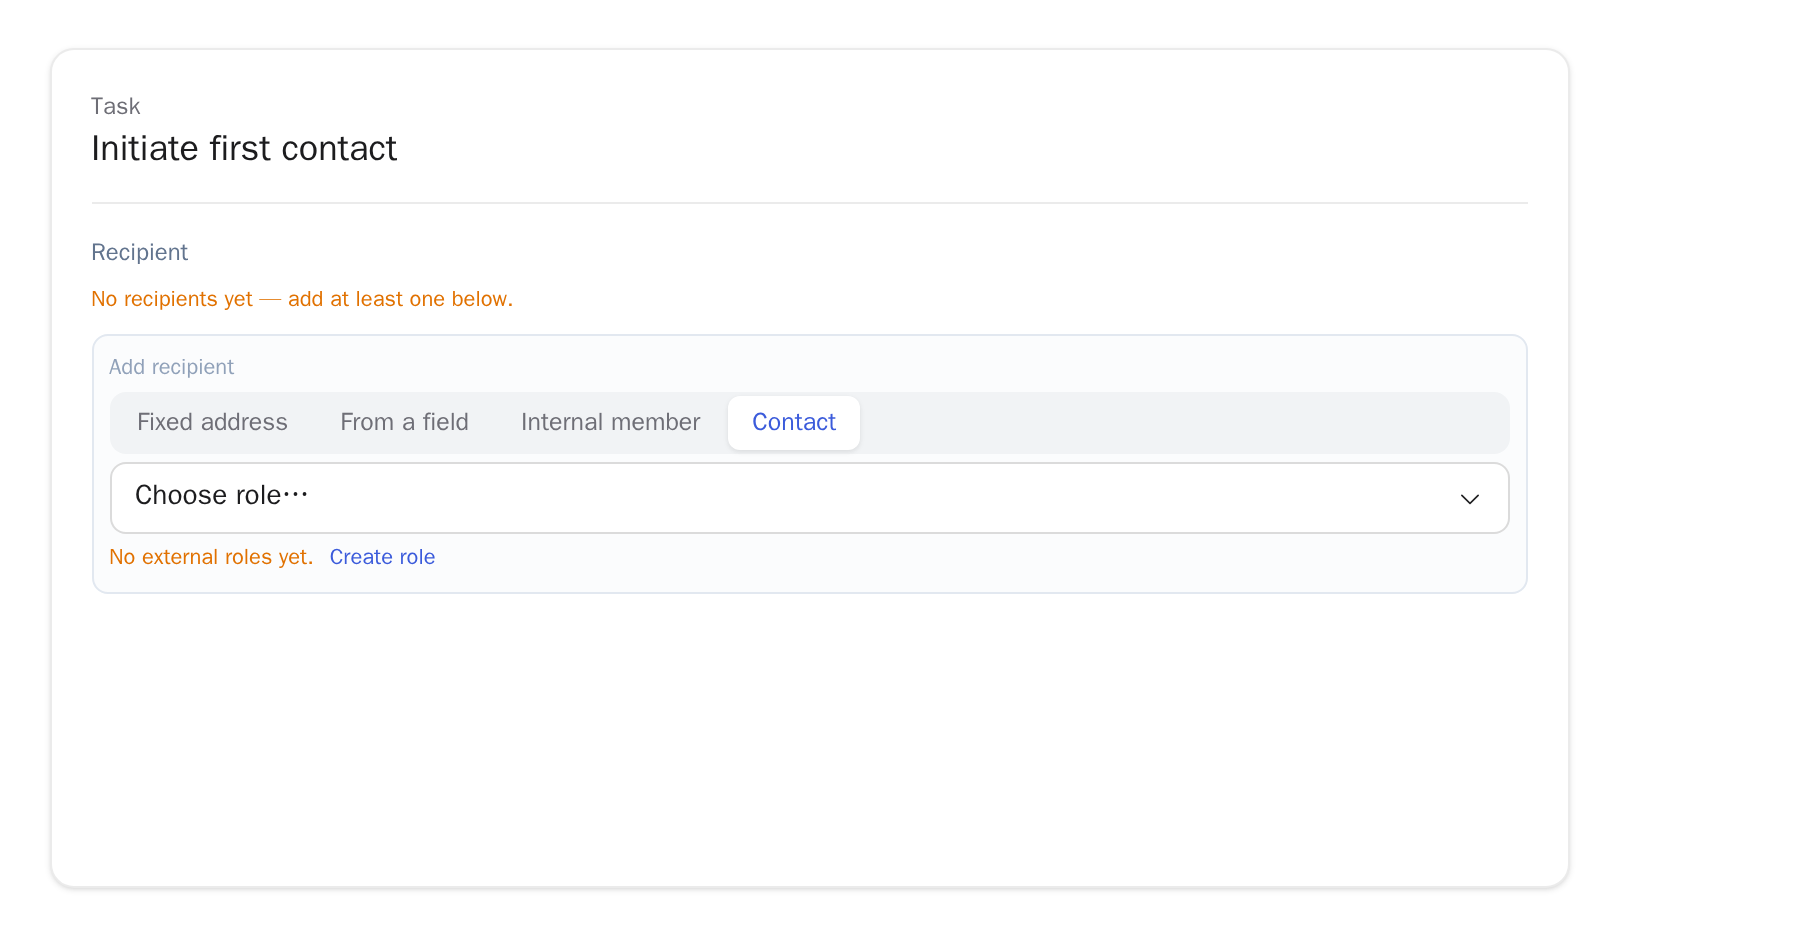
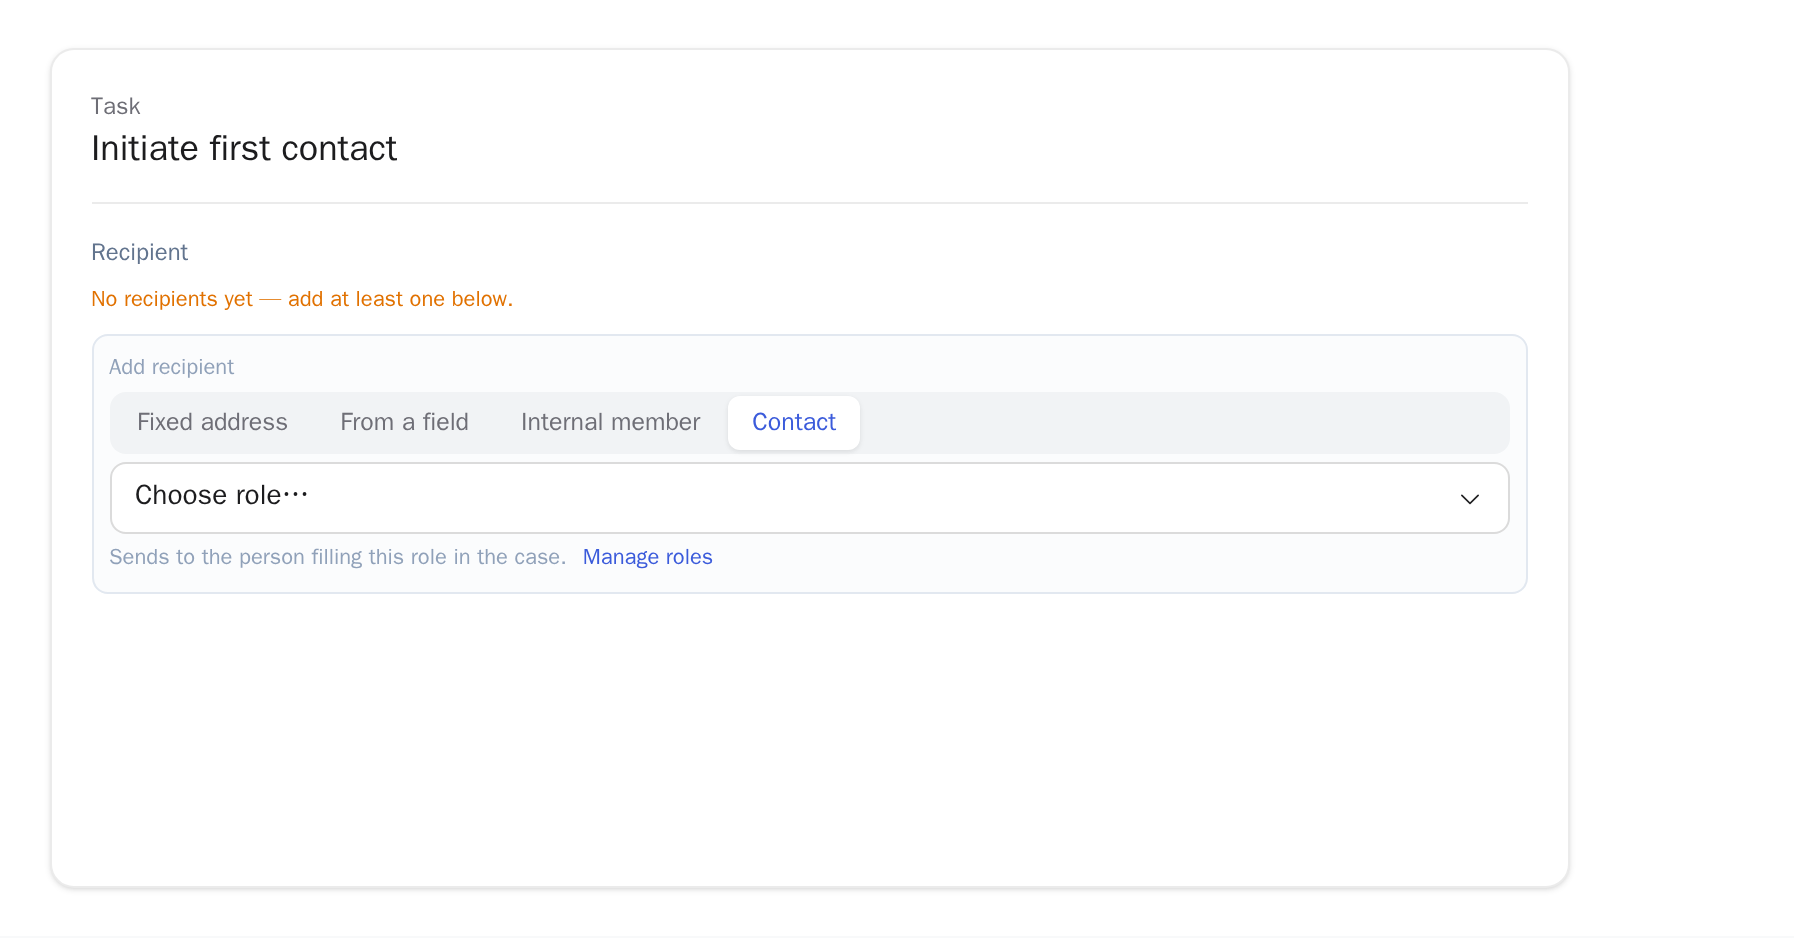
An external role is a placeholder, not a person: on the template you define WHICH roles exist (“Customer”, “Guarantor”) — who fills a role is decided per case. Before you can mark a task as external or send a message to a contact, the role has to exist — otherwise the dropdown in the task editor stays empty. You create external roles in the template editor under “Template settings” → “External roles”. If you choose “Contact” as a recipient in the task editor and no role exists yet, Bricksta shows the hint directly below the role field; “Create role” takes you there from that hint and also appears as a plus action inside the opened dropdown. If roles already exist, “Manage roles” stays visible below the field and the dropdown still lets you create another role.
- 1Open the template → “Settings” button → “External roles” tab.
- 2In the “Role” field, pick a role from your organization's catalog, e.g. “Customer” or “Guarantor”. If it does not exist yet, create it right here via “New role” — it is added to the organization-wide catalog immediately so the same role is named identically in every template. Name the ROLE, not a person.
- 3Optionally pick an email field if the address should come from case data. If you open “External roles” directly from a task, Bricksta only shows fields from steps that run before that task in the process flow; in the global tab, matching fields are ordered by process order. The field is optional: without one, you invite the person later on the case from the task via “Invite externally”.
- 4Click “Add role” — the role is now available for external tasks and for the recipient mode “Contact”.
- External role
- belongs to the template and describes a position outside your organization, e.g. customer, applicant, guarantor, or supplier — a placeholder, not a concrete person. Optionally, an email field can say which case value provides the address. When opened from a concrete task, only fields from true predecessors of that task are suggested; without a field, the person is invited later on the case.
- External contact
- the concrete person — someone with an email address, kept org-wide under Organization → External contacts. A contact fills an external role per case; the same person can take part in several cases and is merged by their email address.
- External task
- in the template editor, flip the “External” switch on a task and pick the role. Only that task is handed outside — everything else stays internal.
- Automatic invitation
- when the external task becomes actionable, the customer receives an email with a direct link into their portal. For security they confirm their email with a one-time code on opening.
- The customer submits, you complete
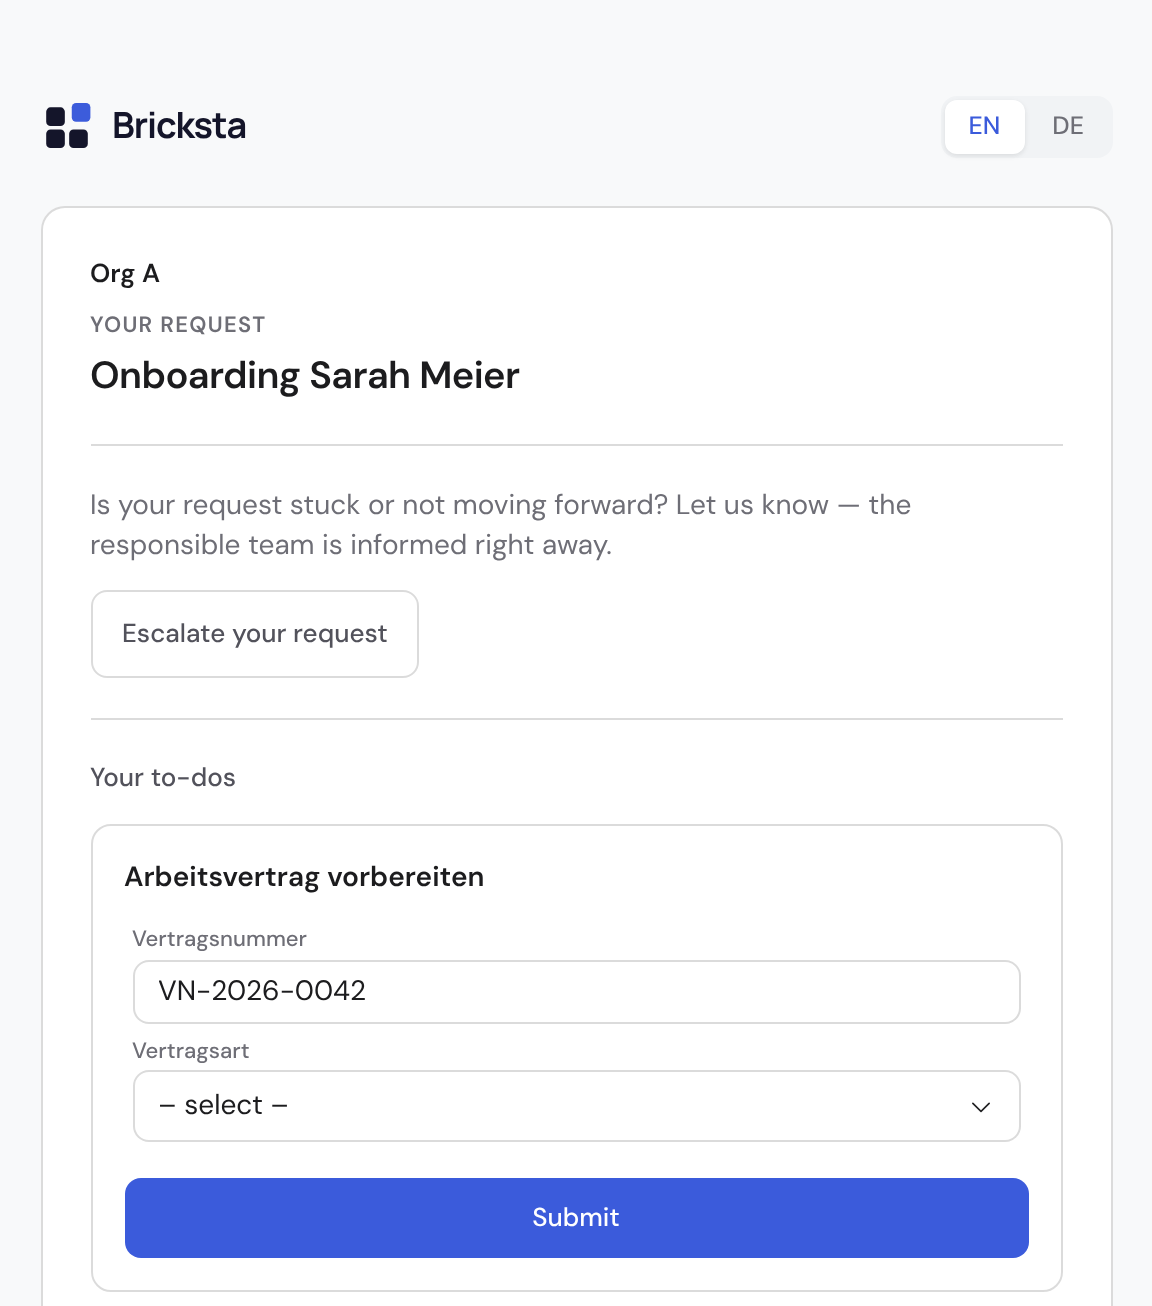
- in the portal the customer only fills the fields of their task and submits. Missing required fields are flagged right at submit, so nothing incomplete reaches you. At the very top the customer sees your organization's name — so it's clear who they are working with. Below that sits the case itself: its title, or the template's name if you did not give it one. Keep in mind that this name then reaches the customer — if your template is internally called “B2B onboarding v3”, give the case a title of its own. As with the guest link, completion stays with your team.
- Which fields the customer can fill in
- almost all of them: text, long text, rich text, email, number, date, yes/no, single and multiple choice, checklist, rating, scale, signature, repeatable groups and dataset lookups. Two kinds stay locked: fields that only certain roles may fill in (the customer holds no role, and “no role” does not mean “every right” here), and fields that need internal context — person, contact and company fields, live-system lookups, and values that are calculated or carried over from an earlier task. The customer sees them with a lock; they are filled in internally.
- Review: accept or reject
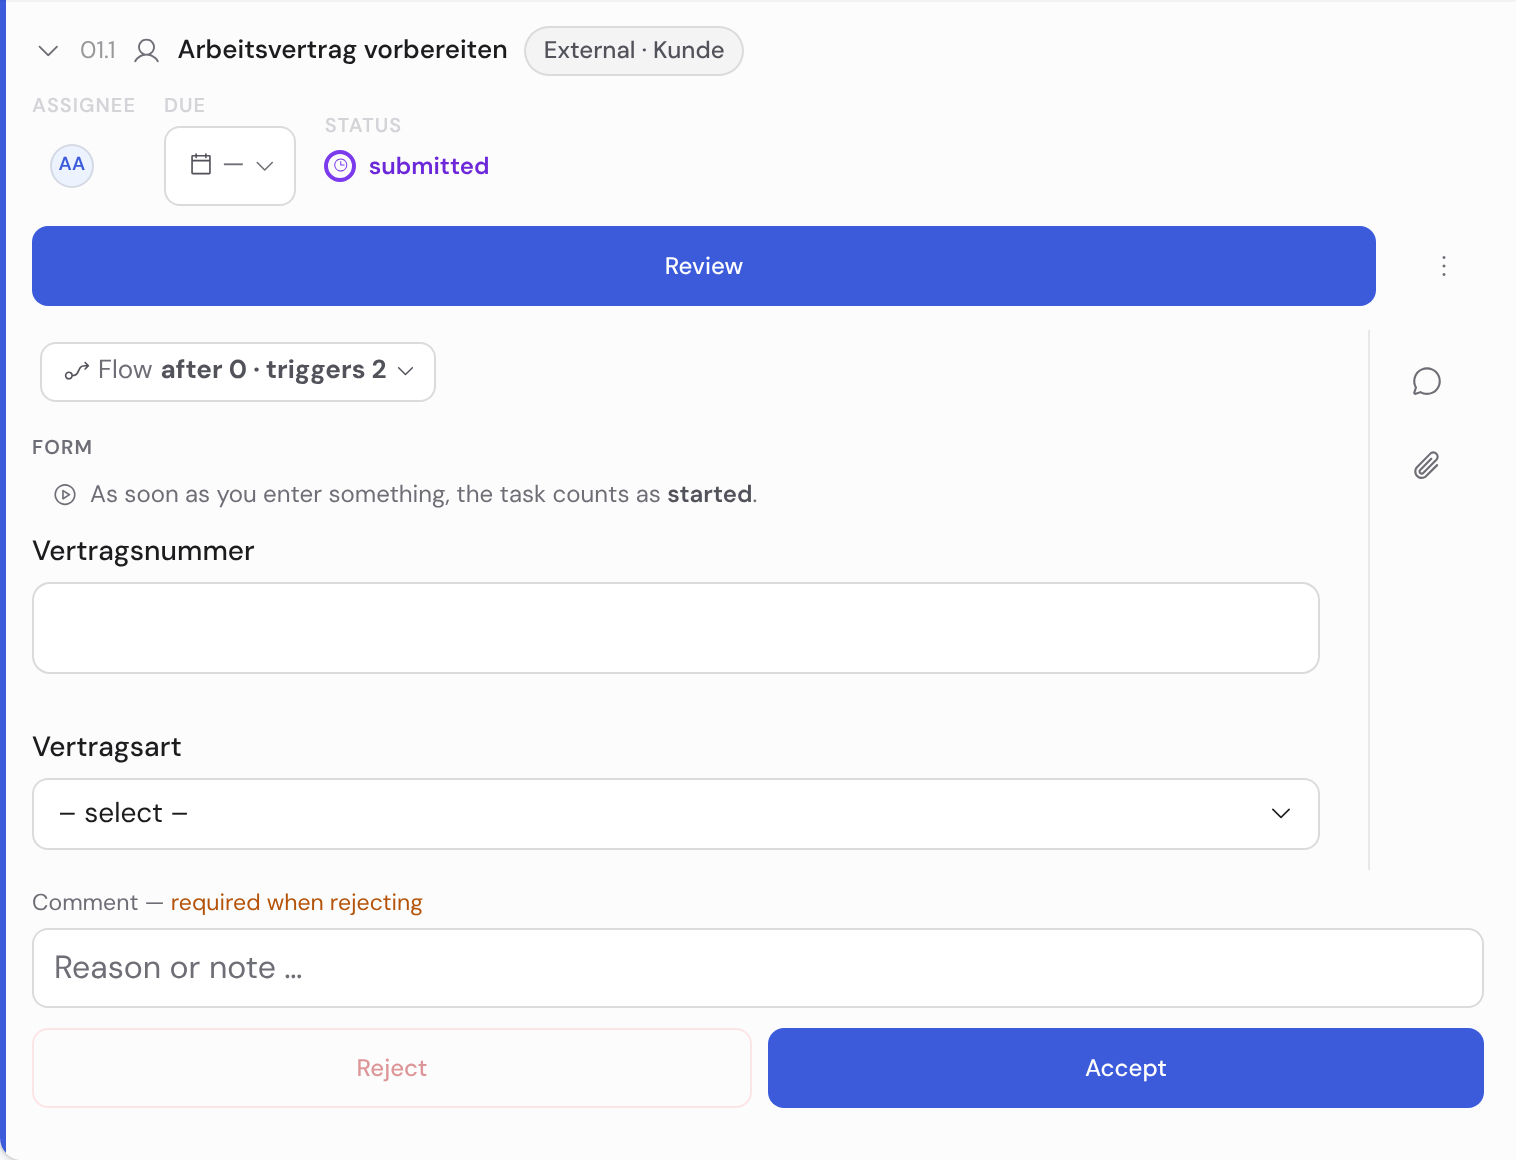
- once the customer submits, the task shows “Submitted” internally. You review the entries and click “Accept” (task done) or “Reject” — it then goes back to the customer with your reason to revise and resubmit.
- You get notified
- when the customer submits, the case owner automatically receives an internal notification (“Customer submitted: …”) that jumps straight into the case — nobody has to watch the portal.
- While the external role has it
- while an external task is waiting on its role, it shows “waiting externally” internally and can't be accidentally started or completed by your team. Its form is write-protected internally as well — otherwise your team writes into the same fields while someone outside is typing. Only after submitting does it turn to “Submitted” and open up for review.
- Fill in on their behalf
- if the customer doesn't respond or dictates the answers over the phone, lift the write protection on the task with “Fill in on their behalf” and enter the answers yourself. The write protection guards against accidents, it is not a permission — anyone allowed to work on the task is one click away. The notice stays visible while you work on their behalf, and the entries also show up in the customer's portal. Who entered them is recorded in the history as always.
- Uploading files
- if the external task has a file field, the customer uploads files right in the portal (one or several, depending on the field) — e.g. proofs or receipts. You then open them in the case like any other attachment.
- Your look (branding)
- under “Organization → Branding” you set a logo and an accent color. Both appear on the pages your customers see — intake forms and the customer portal — and in the emails sent to them. Without them, the neutral Bricksta look stays.
- One login for all requests
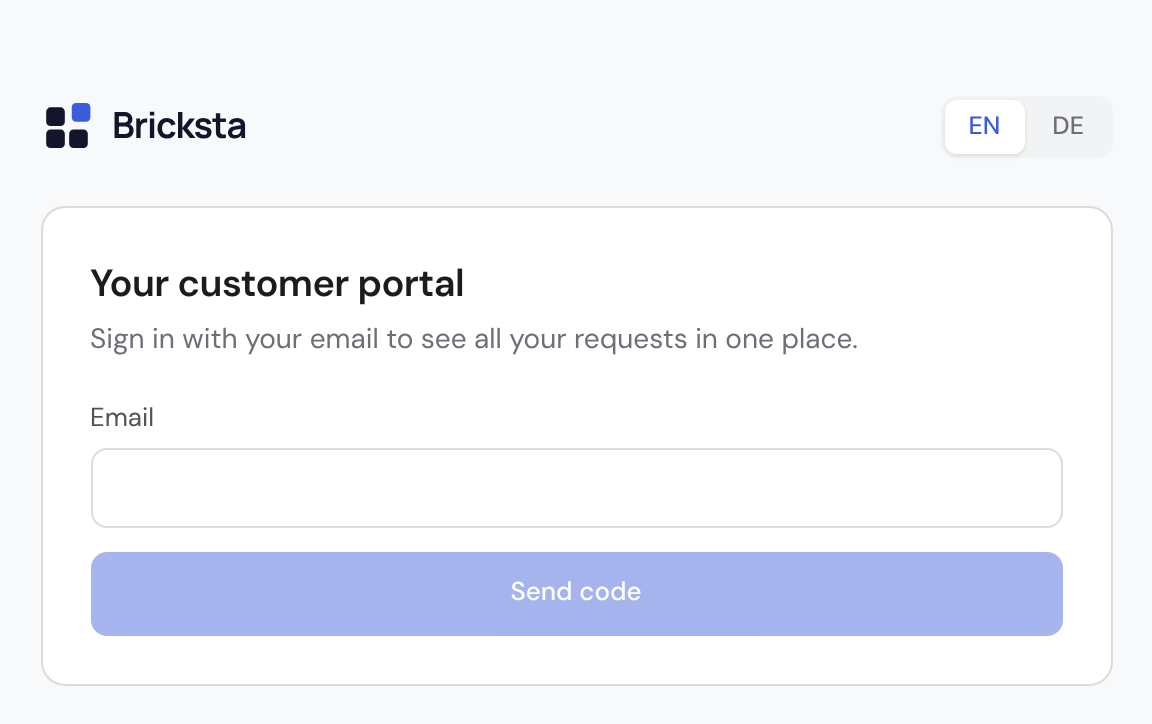
- at /portal the customer signs in once with their email (via a one-time code) and sees an overview of ALL requests they are involved in — even across several organizations. One click opens the respective case right inside the account, without re-entering the code and without hunting for a technical link from an email; “Your requests” at the top left leads back to the overview. They only see cases where their email is a confirmed participant.
- How customers find the overview
- you don't have to tell them the address. Three routes lead there: every portal and confirmation email carries a footer note pointing to /portal; inside a case's portal a link at the bottom — “See all your requests” — leads there; and the footer of bricksta.com carries “Customer portal”, for anyone without an email at hand. If a link from an older email has expired, that same page offers signing in by email as the way out, instead of a dead end. Only for a withdrawn access is this route deliberately absent: there, the end of access is the message.
- Invite external
- if the external person's address isn't (yet) in any field, invite them right on the task via “Invite external” with their email — handy when it only becomes clear later who should take part.
- Invited — and how to take it back
- once someone is invited, the task shows the state “Invited · address@…” next to the external marker, so you can see at a glance who you are waiting for (hovering also shows the invitation date). The task's ⋯ menu then offers two routes: “Resend invitation” (same address, same task, new email — for when the first one got lost) and “Withdraw invitation”. Withdrawing revokes that person's portal access: the link from the invitation email stops working, the task is free again and you can invite someone else — useful when the address was wrong. Note the reach: access belongs to the external role, not to a single task. If the same role has several tasks in the case, access ends for all of them — the confirmation dialog tells you. Once they have submitted, withdrawing is blocked; from then on you decide via “Accept” or “Reject”.
- Track the request
- whoever submits an intake form gets their own portal link in the confirmation email and can check the status of their request.
See all external contacts organization-wide and revoke access
Under Organization → External contacts, Bricksta gathers every external participant of the organization in one place — each person once, even when they take part in several cases. Unlike members, external contacts have no account and no permissions; they take part in individual cases through a portal link. Use the toggle to switch between contacts, companies and roles — under “Roles” you maintain the organization-wide vocabulary of external roles (customer, applicant, guarantor, project lead on the customer side) that templates pick from; no permissions are attached to them. A contact belongs to a company (customer), so the organization-wide list does not become a flat pile. The contact list separates confirmed from not-yet-confirmed email addresses; the detail view shows each contact's data (email, phone, function, company), their cases, their role in them and the status of the portal access: active, read-only, expired or revoked.
From here you can revoke a portal access at any time — per case, or for all of a person's accesses at once. A revocation takes effect immediately: when the person next opens their link, they see a notice that their access was revoked. A revocation can be lifted again just as easily; the person then gets a fresh link and the old one stays dead. This is the central place for offboarding external participants and for access or erasure requests.
There are two routes to the same result — the difference is who takes them and why. Organization-wide here is the place for offboarding and erasure requests; it requires the permission to manage contacts. On the task inside the case, “Withdraw invitation” (⋯ menu) covers the everyday case instead: wrong address, wrong person, someone else after all. Anyone who could invite on that task may do it, and it makes the task invitable again right away. Both revoke the same portal access.
You create and edit contacts and companies right here (“New contact” / “New company” and “Edit”; this requires the permission to manage contacts). In addition, contacts still appear automatically via an intake form or when you invite someone to a case. Beyond creating them, this view gives you the organization-wide overview and control over portal access.
Set up look and protection
A few one-time settings determine how your customer pages look and how they are protected — independent of the individual form.
- Branding (logo & color)
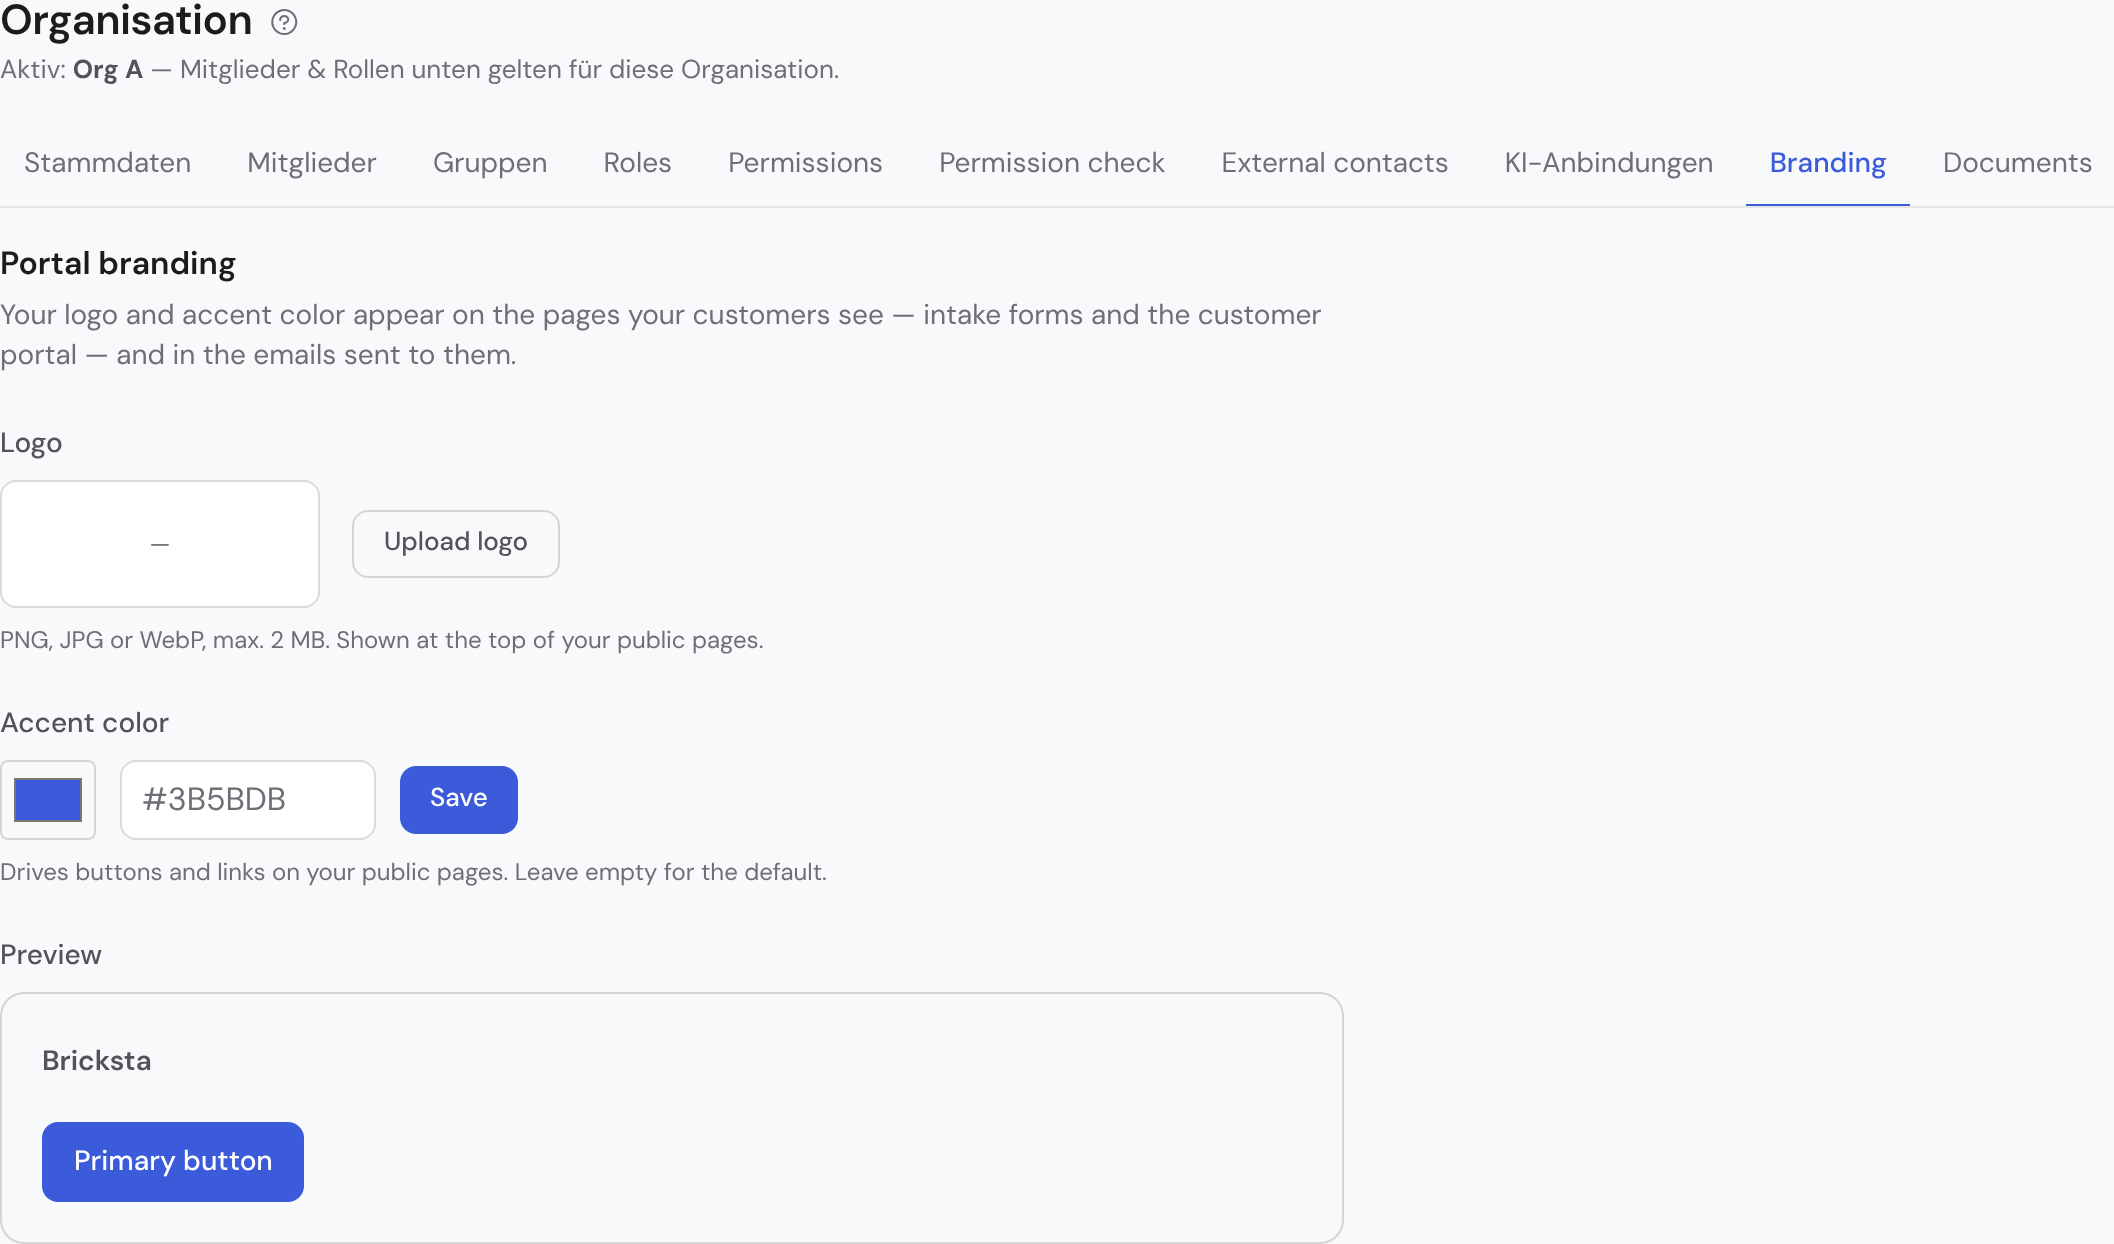
- under “Organization → Branding” you upload a logo (PNG, JPG or WebP, max. 2 MB) and pick an accent color. A live preview shows immediately how the customer portal looks; a warning appears if white button text would be hard to read on your color. Both apply on intake forms, in the portal and in the emails to your customers — including portal sign-in codes and guest-link emails. The logo sits in the email header below the Bricksta mark; only an email that spans several organizations (the customer-account sign-in code) stays neutral. Without them, the neutral Bricksta look stays. You can change either one independently, and both have a way back in the ⋯ menu of their row: “Remove logo” (with a confirmation — the image file is deleted for good) and “Reset to default” for the accent color.
- Bot protection
- Cloudflare Turnstile keeps out automated submissions — a short check appears above the submit button on your forms. This is already active in Bricksta; you don't need to set anything up. Per form you can control it via the “Bot protection (Turnstile)” toggle (on by default).
- Emails to customers
- all messages to customers (confirmation, portal invitation, one-time code, rejection reason) are sent by Bricksta via the Resend service from the EU region — GDPR-compliant, with nothing for you to set up.
- Republish old forms
- a form you published BEFORE these additions only shows logo/color and the multi-language support after you republish it ONCE — the frozen snapshot is refreshed in the process. New forms don't need this.
Security and privacy
- No case without confirmation
- With double opt-in on, a case is only created after the email click — proving email ownership and consent.
- Consent is frozen
- The version of the consent text used is stored per submission as proof.
- Bot protection
- Cloudflare Turnstile keeps out automated submissions — active in Bricksta with no setup.
- Abuse protection
- The public endpoints are throttled against too-frequent requests per email, per sender and overall.
- No internal data leaves
- The public form only serves the published fields — never internal structure, roles or other cases.
The public page links to the imprint and privacy notice and processes data in the EU region.