On this page
How an outbound webhook works
A webhook listens for an event in a case's lifecycle for a given template — created, started, completed, a task completed or a phase completed. When it occurs, Bricksta posts the related data as JSON to the configured target address. Because almost every tool accepts inbound webhooks, this one building block covers any number of target systems.
Creating a webhook
- 1Open Automation → Outbound.
- 2Give the webhook a name, choose the template and the event it should react to.
- 3Enter the target address (URL) of the receiving system. It must be publicly reachable — Bricksta rejects addresses that point into an internal network (such as localhost, 127.0.0.1, private ranges or a cloud metadata address).
- 4Optional: generate a secret — Bricksta then adds a signature to each send so the other side can verify authenticity.
- 5Use “Test send” to check the connection before the webhook goes live.

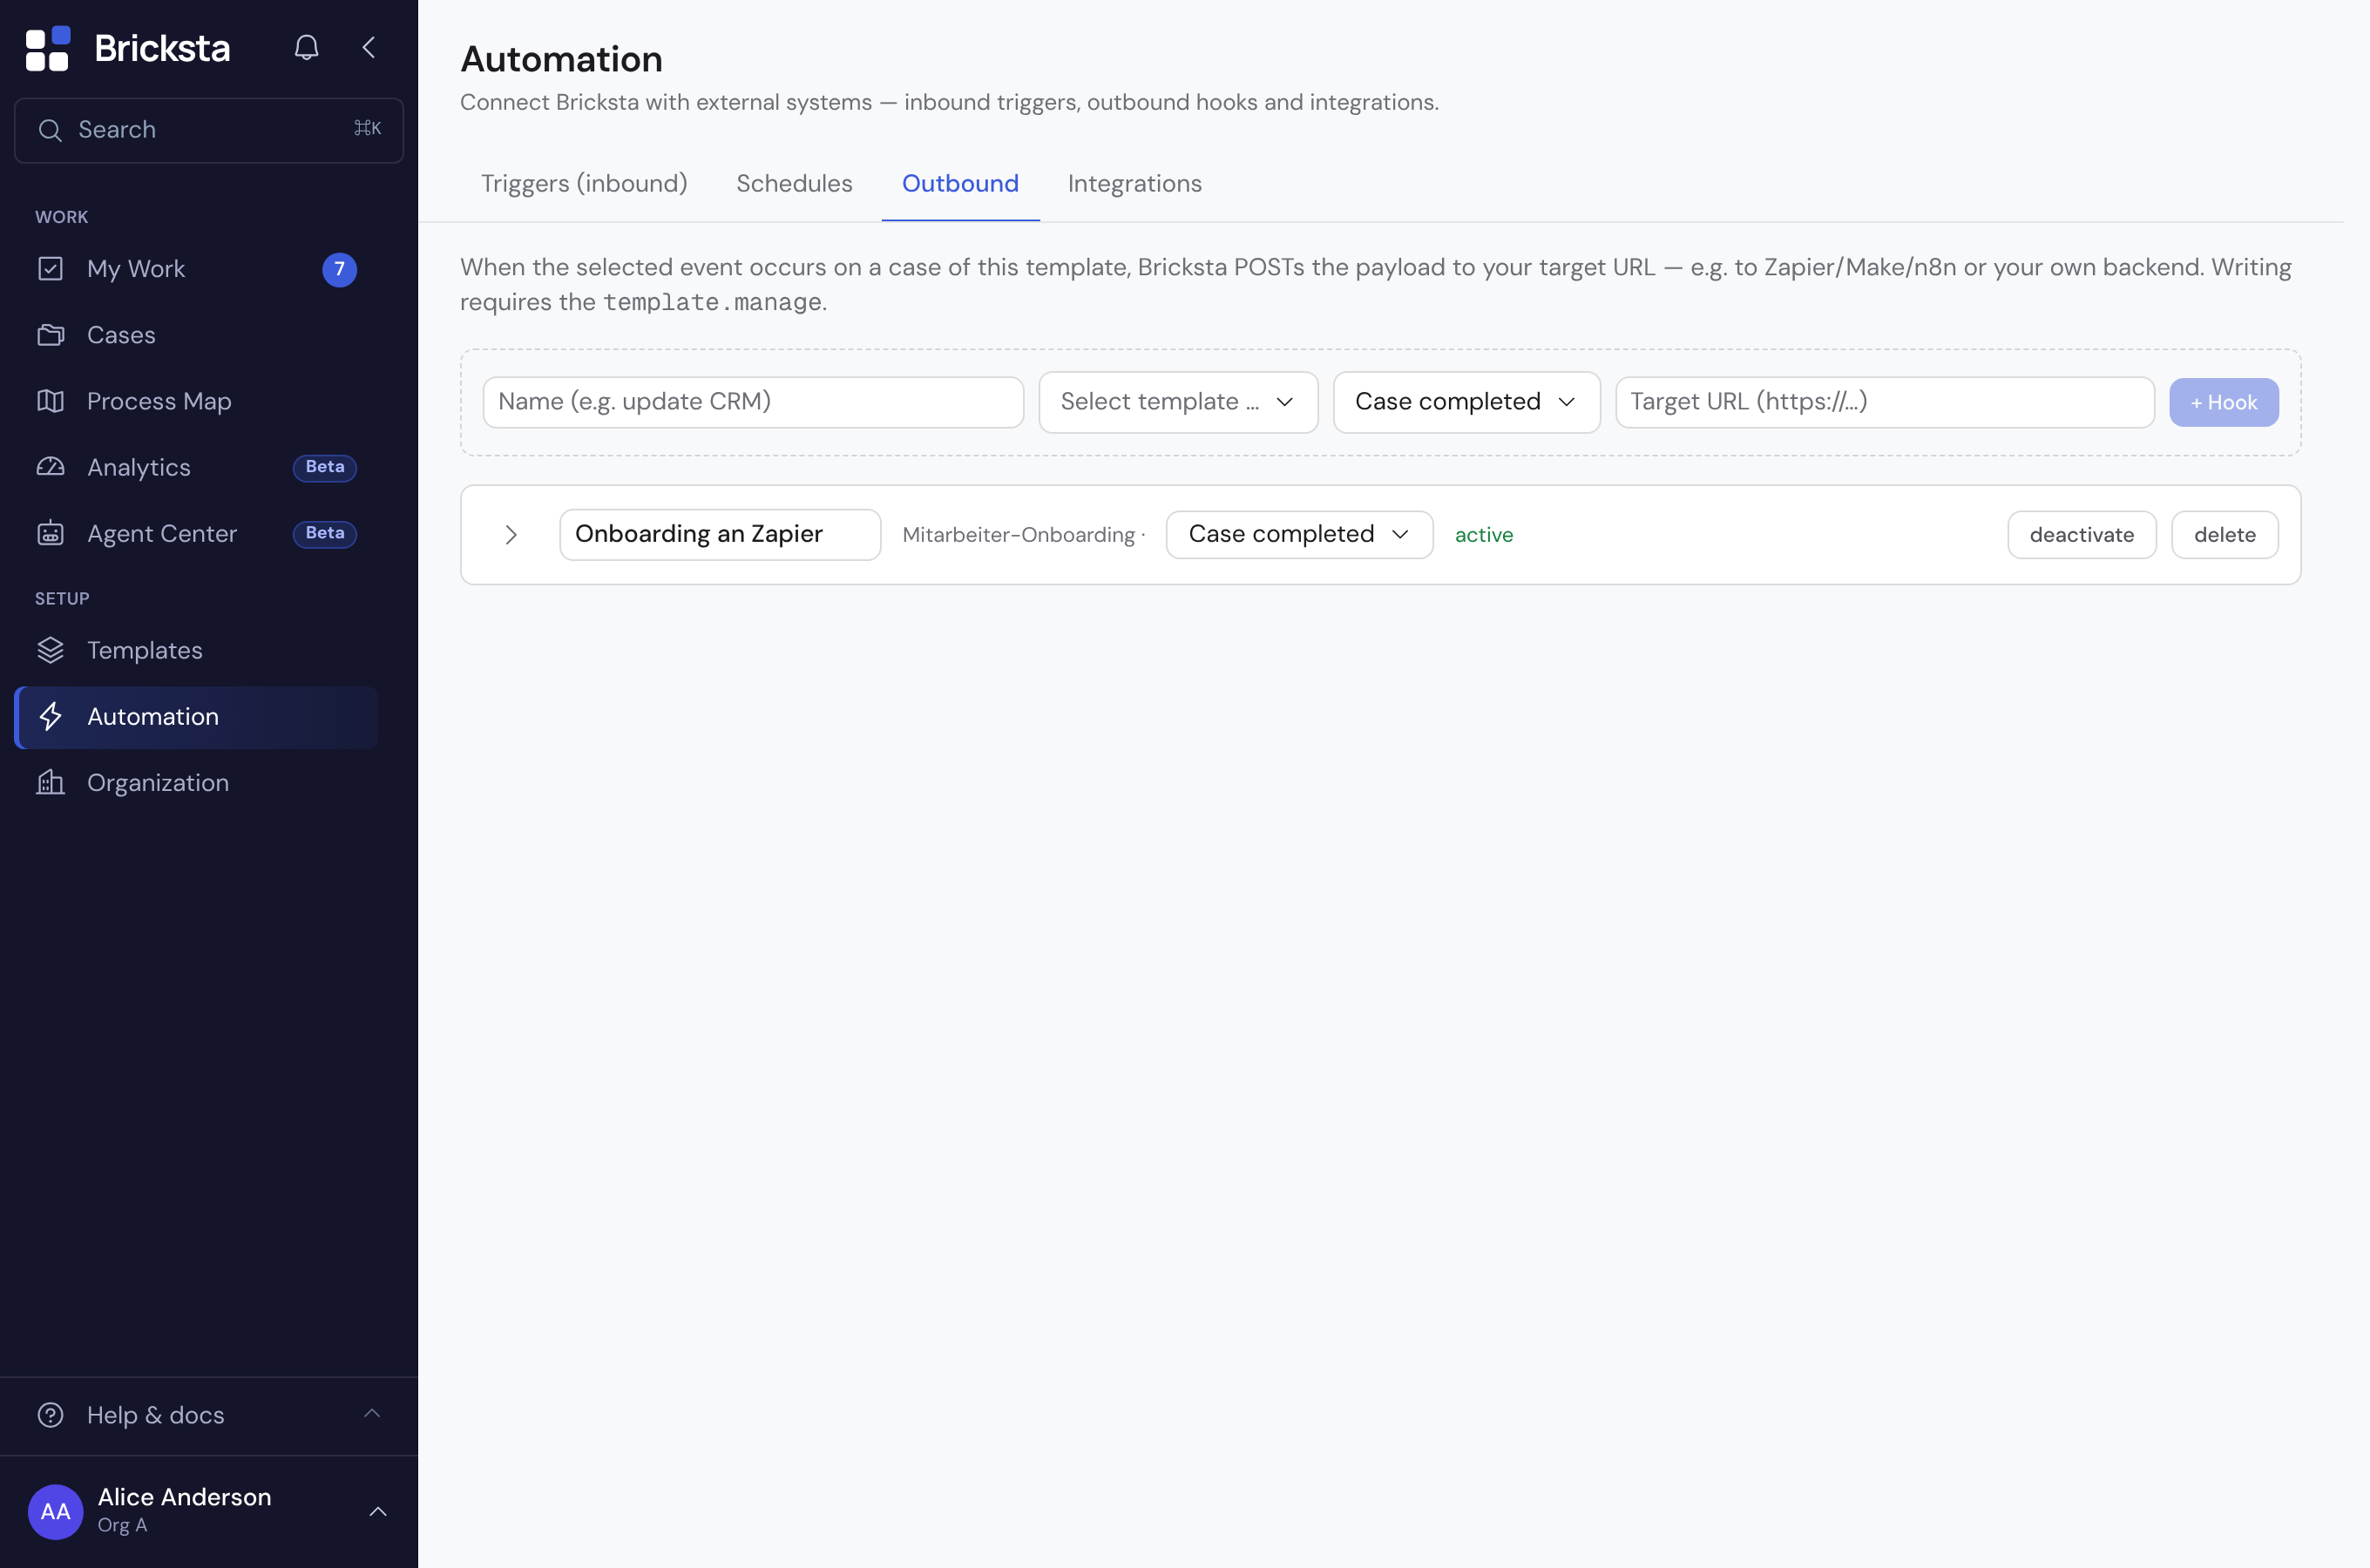
Every send is recorded with its HTTP status in the run log, so you can see whether the other side accepted it. Use the active switch to pause a webhook without deleting it.
If the other side does not answer, Bricksta aborts the send after ten seconds and records it as a failed attempt — a stalled target therefore does not hold up your other webhooks. A single failed send is not repeated: it stays in the run log with its error, and the following events continue as usual. Bricksta only retries when it could not process an event at all — and at most five times, after which it gives the event up. Targets that already accepted a send are not called a second time during such a retry.
Managing outbound webhooks requires the template-management right (template.manage).