On this page
Why live fields?
Many tasks need data that already lives elsewhere: the open support ticket number in Jira, the customer in your CRM, the licence amount in your contract system. A live field looks that data up directly in the source instead of duplicating it. The reference stays current and traceable — including a direct link back into the external system.
The template is system-neutral: whether a customer field is backed by HubSpot, Salesforce or a campus system is decided by your organisation’s connection — not the template. The same field keeps working later with a different provider.
The two field types
- Live lookup (external system)
- Links the task to a real record. The person working the task searches (e.g. for a ticket) and picks a match; what is stored is the link — shown as a chip with key, title and an open link. Multiple references are possible too.
- Live value (external system)
- Shows a derived, read-only value — any property of the chosen record (e.g. a company’s ARR, a contact’s address, a project’s lead) or a sum over a metric. It refreshes as soon as the parent field changes.
Step 1: Connect the external system
Before a live field can load data, an organisation admin connects the source system once, under Integrations.
- 1Open Automation → Integrations (visible to organisation admins only).
- 2Every connectable system has its own card (Jira, HubSpot, Pipedrive). Each card briefly states what the system is for (e.g. “Sync tasks and issues with Jira projects”) — this function stays visible even after connecting. Start the connection via that card’s Connect button.
- 3Sign in on the provider’s screen and approve access. Bricksta stores the credentials encrypted.
- 4Back in Bricksta the connection shows up with status Active.
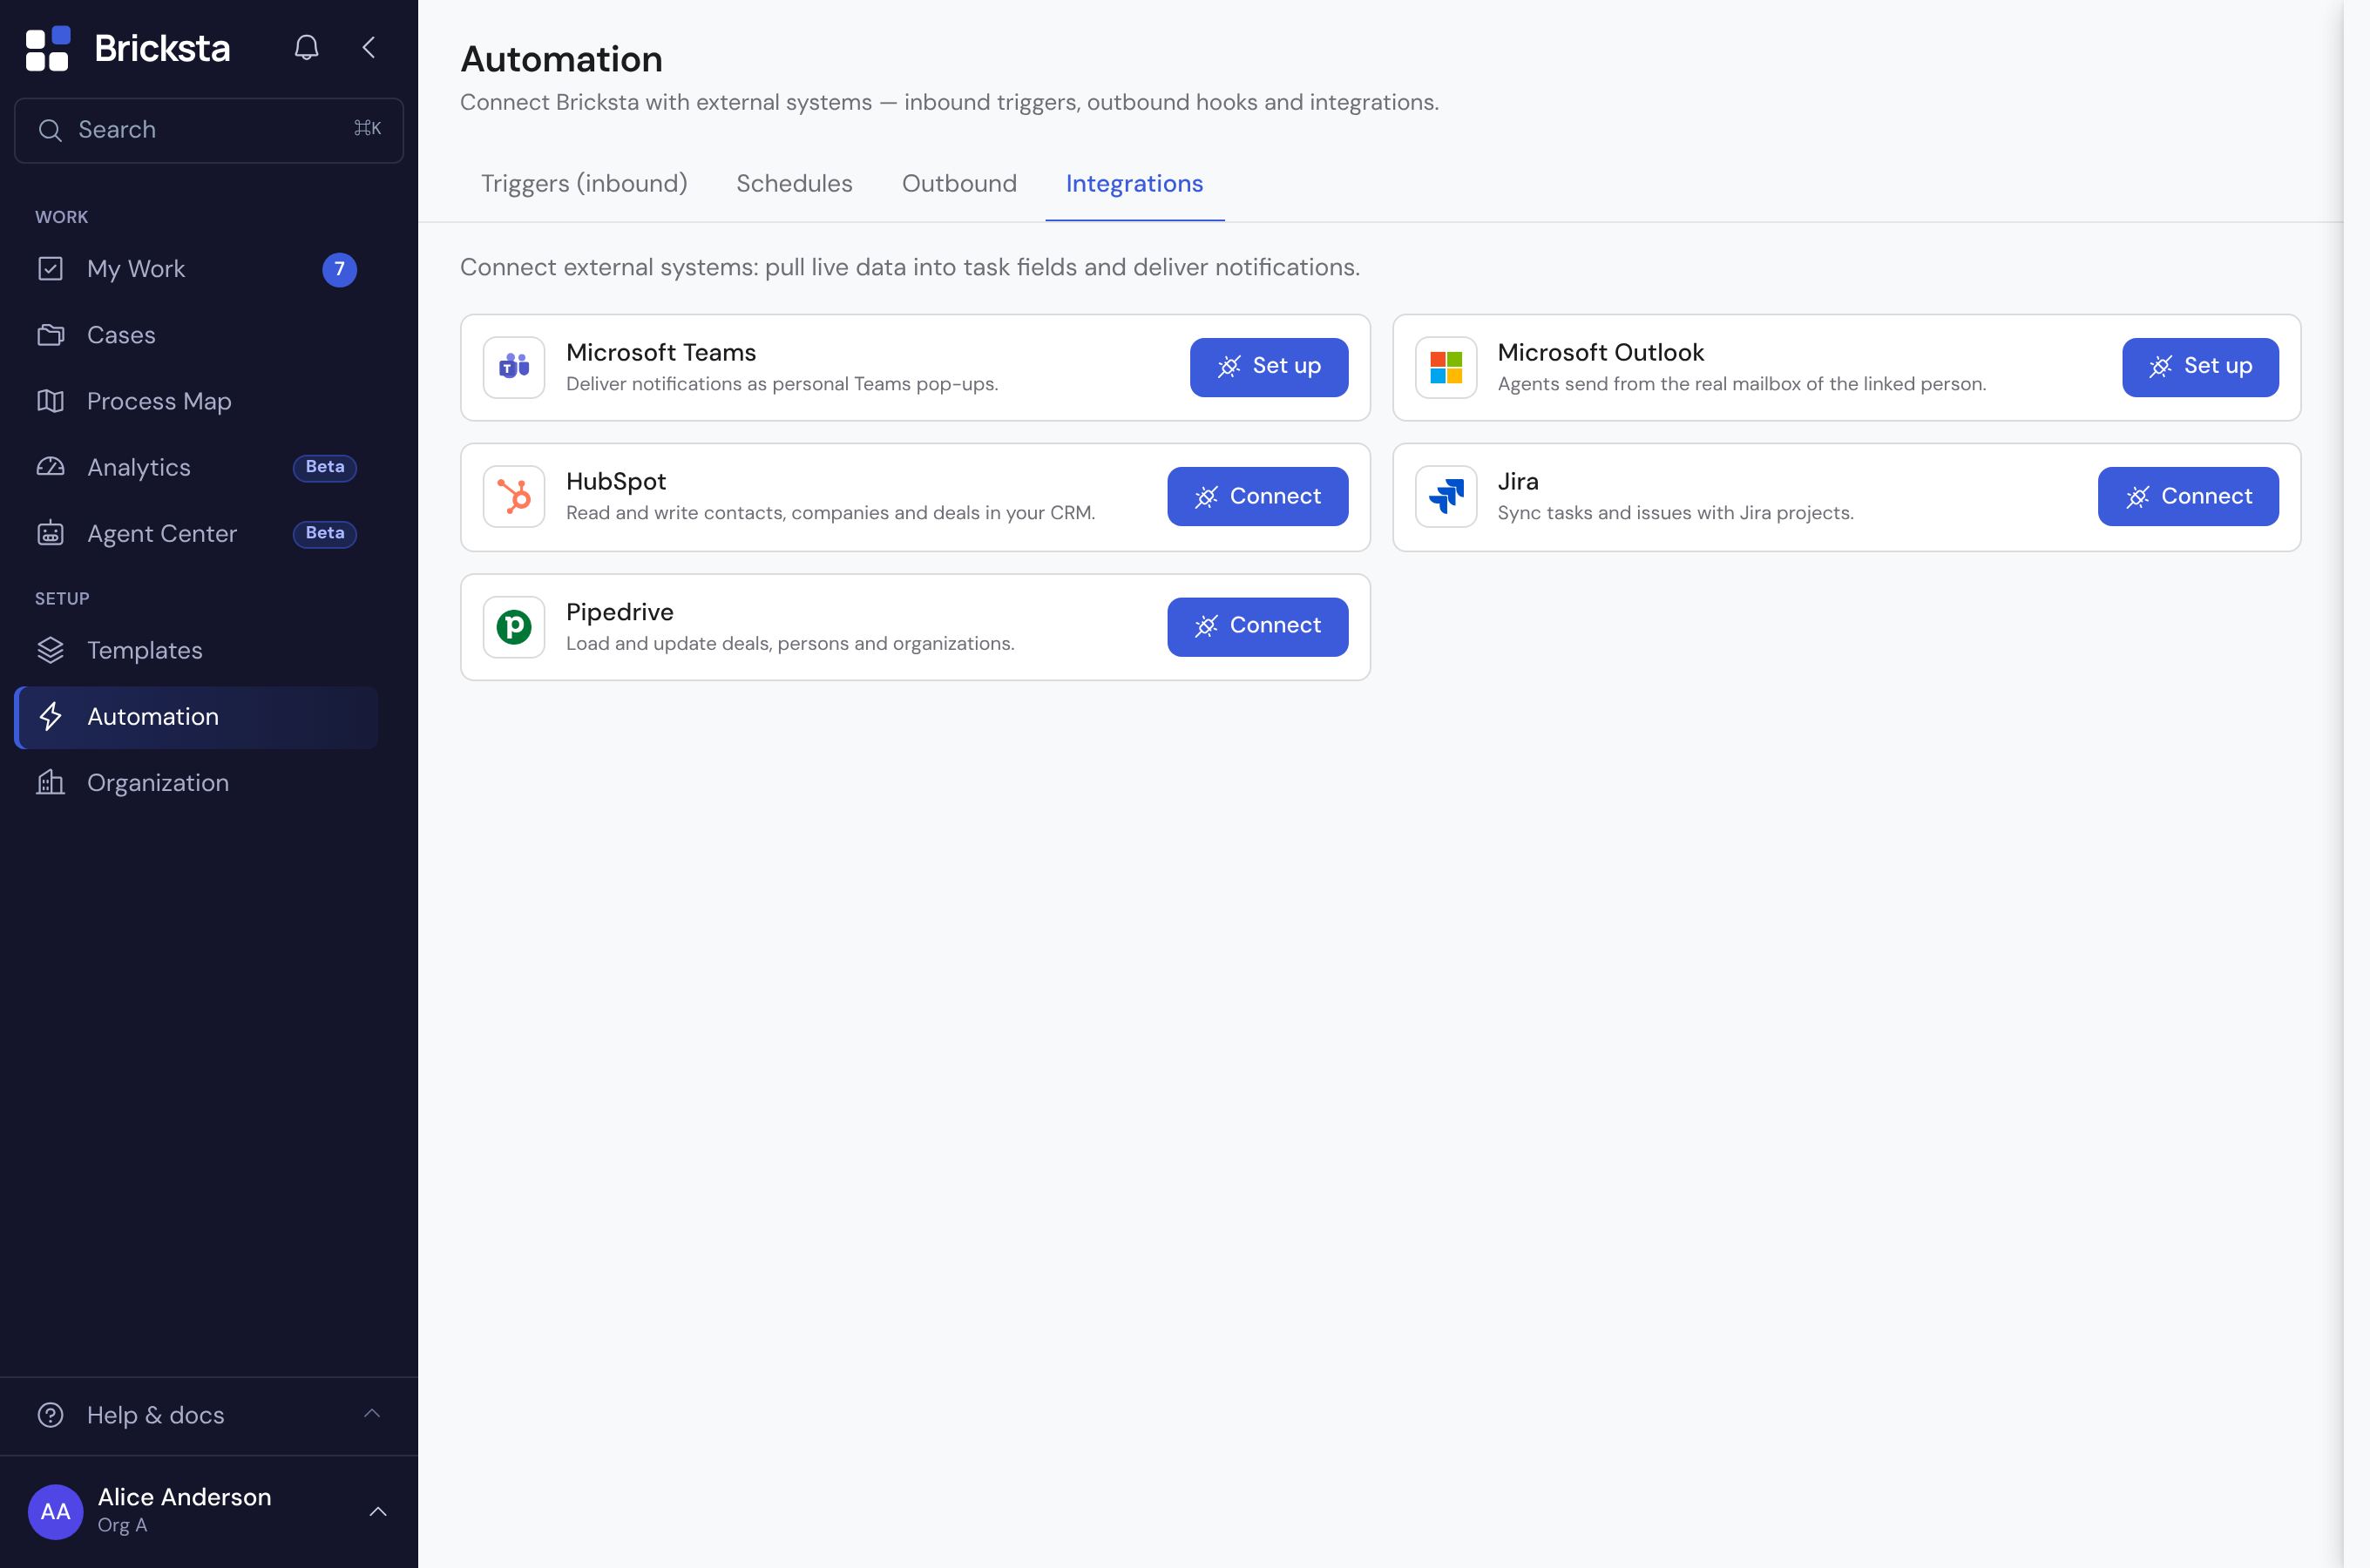
Jira and Pipedrive are connected by signing in with the provider (OAuth). HubSpot is connected via an access token — for it the button opens a field where you paste the token. In every case Bricksta stores the credentials encrypted.
Bricksta requests only the permissions it needs (read for search, optionally write for write-back). The connection is organisation-wide — every live field uses it without people signing in individually.
Step 2: Add a live field to the template
You add live fields like any other output field in the template editor — with a small extra configuration that sets the business meaning.
- 1Add an output field to the task and choose the field type Live lookup (external system) or Live value (external system).
- 2Resource: the business object the field references (e.g. Jira issue or HubSpot contact).
- 3Behaviour: Free search (search the record freely), Depends on another field (choose from a parent field, e.g. sub-tasks of an issue), or Derived value (live value only).
- 4For Depends on another field or derived values: pick the parent field first, then the attribute.
- 5The resource follows the parent field: the same resource yields a property of the chosen record (company → its postal code), a dependent resource a metric over related records (company → the sum over its issues). Only then is the aggregation offered; other combinations are not offered at all, and existing ones are flagged.
- 6Optionally Allow multiple references if the field should hold more than one record.
Only resources and behaviours the connected provider actually supports are offered. If a system cannot do a dependent list, for example, that option will not appear for it.
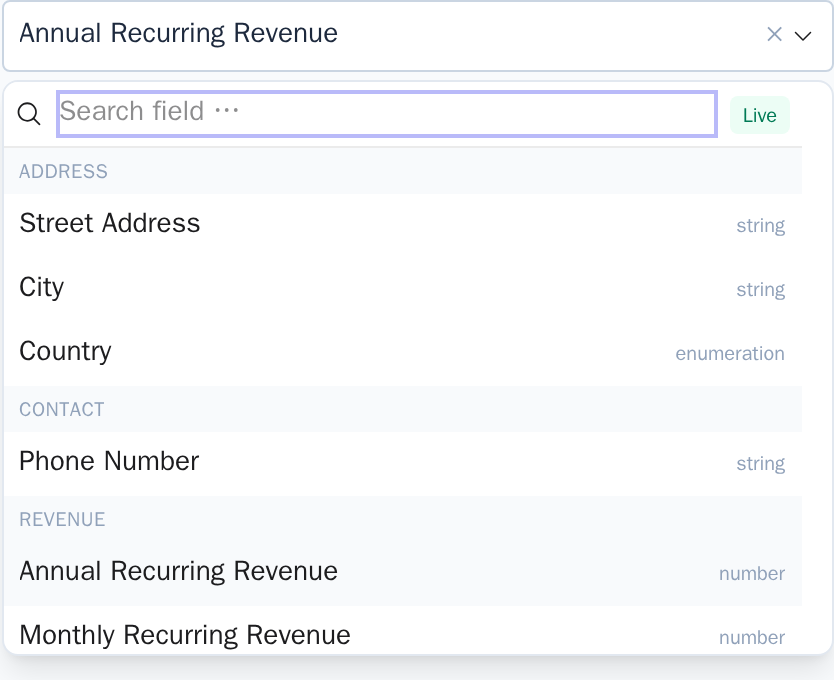
For a Derived value you pick the attribute from a searchable list that Bricksta reads live from the connected system — so any field that actually exists (including custom fields), not just a fixed set. Without an active connection a small default list is used as a fallback.
Step 3: Filling in the task
Inside the task a live field behaves like a lookup field: type, search, pick.
- Typing into the field starts the search in the external system; matches show up as suggestions.
- A match is stored as a chip — with key, title and an open icon that opens the record in the source system.
- When multiple references are allowed you can collect several chips side by side; each removable on its own.
- A live value field fills itself and is read-only — it follows the parent field.
Doesn’t the record exist in the external system yet? Use „Create new“ in the search field to add it right there — with the required fields (e.g. name or email); it is created and immediately taken as the reference. Creating is a deliberate action (a „Create“ button) and never happens automatically.
If the connection has expired or access was revoked, the field reports „unavailable“ instead of showing stale data. An admin restores the connection under Integrations.
Case properties: customer & contact right at creation
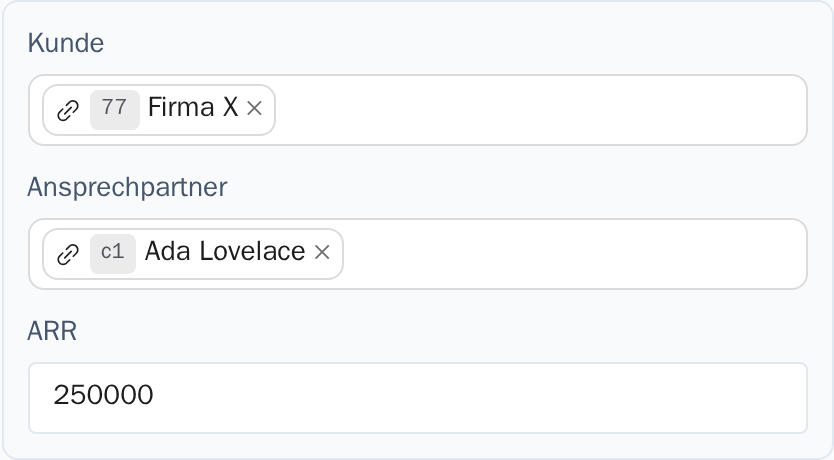
Some references belong to the whole case rather than a single task — the customer an onboarding is about, or their main contact. Such references can be defined as a case property and picked right when a case is created. They appear in the case header and are visible from anywhere in the case. Properties that aren’t filled yet stay visible there as a field labelled “Assign …”, so you can also add or change them later on the case (clicking the property opens the editor).
- 1In the template editor, open the “Case properties” tab via the “Template settings” button.
- 2Add a property: a label (e.g. Customer), the type Reference (pick object) or Derived value, and the resource (e.g. HubSpot company).
- 3For dependent properties (e.g. Main contact) set Depends on to the parent property — so the choice comes from the previously picked object.
The choice cascades: pick the company first and the contact field only offers contacts of exactly that company. Switch the company and the contact resets. Derived properties (e.g. ARR) pull their value live from the chosen object.
At creation only the link is stored (with key and label); derived values are loaded live on demand, not copied permanently. Defining case properties is an organisation-admin task.
Create automatically when a task is reached
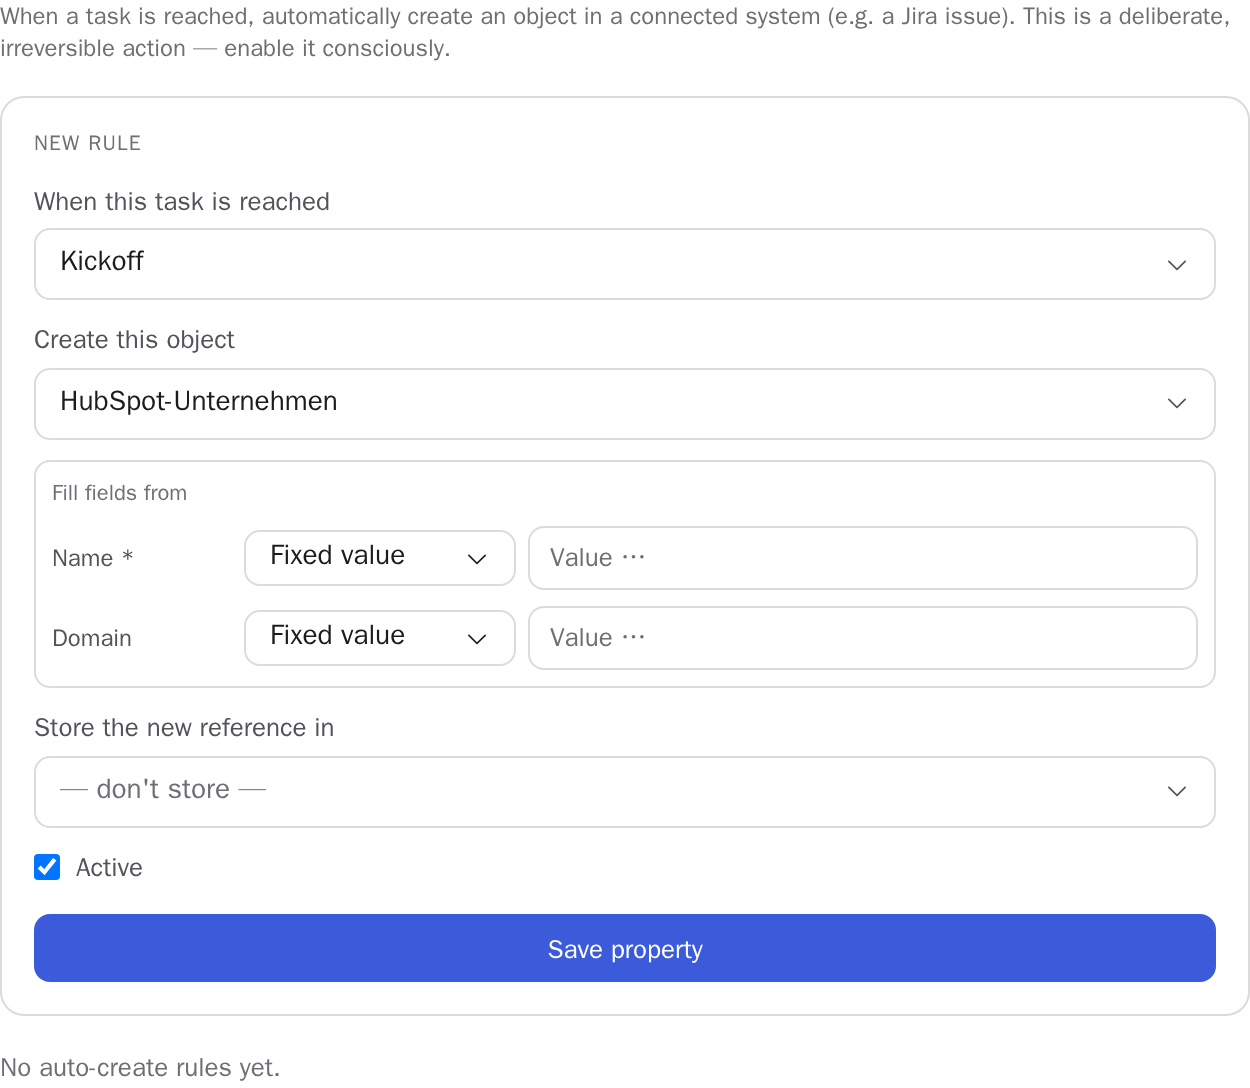
Instead of picking or creating an external object by hand, a task can do it automatically: when the task is reached in the flow, Bricksta creates an object in the connected system (e.g. a Jira issue) and can store the new link straight into a case property. Initial values come from fixed inputs or from case properties. You set this up in the template editor under Auto-create (organisation admins only).
Automatic creation is a deliberate, irreversible action — a created object cannot be undone. That is why every rule must be enabled explicitly. Bricksta creates exactly one object per reached task (no duplicates on re-runs); failures stay traceable on the case.
Deliver notifications (Microsoft Teams)
On the same page, as an administrator you set up Microsoft Teams as a delivery channel — separate from the live-field connections above. Every Bricksta notification can then also reach your people as a personal Teams pop-up.
- 1Publish the Bricksta app once in your own Teams admin center and grant admin consent to the three app permissions.
- 2In the “Microsoft Teams” card, click Set up and enter the directory (tenant) ID and the Teams catalog app ID. Note: the catalog app ID is not the Azure app registration ID.
- 3Switch delivery on and save. Use “Test connection” to immediately check that tenant, admin consent and catalog app ID line up.
Only once Teams is enabled here do the Teams switches in the notification matrix (Settings › Notifications) become available to your people.